Claim Your Free Consultation and Quote Today
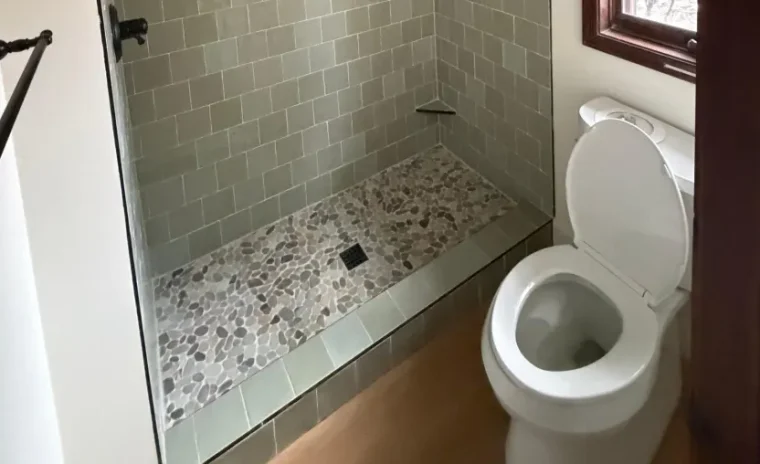
Master Your DIY Bathroom Remodel in Prescott, AZ
Assessment and Planning: Setting the Foundation for Success
Before purchasing a single tile or fixture, evaluate your existing bathroom thoroughly. Measure the space carefully, noting the location of plumbing lines, electrical outlets, and structural supports. Document what stays and what goes. In Prescott’s older homes, particularly those built before the 1980s, you may encounter cast iron drain lines or outdated electrical systems that require special attention during renovation.
Identify your priorities early. Are you addressing functionality issues like poor drainage or inadequate lighting? Or are you focused on aesthetic upgrades? Most successful remodels balance both. Create a detailed list of must-haves versus nice-to-haves. This clarity prevents scope creep and budget overruns later.
Consider the structural realities of your space. Check for water damage around the tub, toilet base, and under the sink. Arizona’s dry climate can mask slow leaks that only reveal themselves once you start demolition. Test all fixtures for proper function. Understanding the current condition helps you anticipate hidden costs and avoid surprises mid-project. If you discover significant structural concerns, consult a professional before proceeding with demolition.
Design Selection and Budget Development
Once you understand your space, translate your vision into specific design choices. Select your vanity, toilet, shower or tub, flooring, and wall finishes. Visit local suppliers in Prescott and neighboring areas to see materials in person. Lighting conditions in showrooms differ from your home, so request samples whenever possible. Bring paint chips and material swatches to ensure colors coordinate under different lighting.
Build your budget with realistic numbers. Allocate funds for materials, tools you do not already own, permits if required, and a contingency of at least 15 percent for unexpected issues. Track every expense in a spreadsheet. Material costs vary widely. A basic fiberglass tub costs significantly less than a freestanding soaking tub. Porcelain tile offers durability at moderate cost, while natural stone requires more investment and maintenance.
Price out fixtures from multiple sources. Big-box retailers offer convenience, but specialty suppliers sometimes provide better quality at comparable prices. Do not forget the small items that add up quickly: caulk, grout, underlayment, primer, screws, and adhesives. Many DIY remodelers underestimate these ancillary costs by 20 to 30 percent. Download a bathroom remodel checklist template to ensure nothing slips through the cracks. A well-planned budget keeps your project moving forward without financial stress.
Preparation and Material Acquisition
Preparation determines whether your remodel proceeds smoothly or turns into a frustrating ordeal. Gather all tools before demolition begins. Essential items include a pry bar, reciprocating saw, drill with various bits, level, measuring tape, tile saw or scorer, notched trowel, grout float, and safety equipment like goggles and dust masks. Rent specialty tools like a tile saw rather than purchasing equipment you will use once.
Order materials with delivery timelines in mind. Some items like custom vanities or special-order tiles require weeks for delivery. Sequence your orders so materials arrive when you need them, not all at once. Storing a full bathroom worth of materials in a small space creates chaos. Verify quantities carefully. Calculate tile needs with 10 percent overage for cuts and future repairs. Nothing halts progress faster than running short of materials mid-installation.
Prepare the work area properly. Remove everything from the bathroom and adjacent spaces that could be damaged by dust or moisture. In Prescott’s older neighborhoods, homes often lack exhaust fans sized for renovation dust. Set up plastic sheeting barriers and use box fans with filters to control airborne particles. Protect flooring in hallways leading to your dumpster or disposal area. Turn off water supply lines and electricity to the bathroom at the circuit breaker. Proper preparation prevents damage to the rest of your home and keeps the project contained.
Execution: Installing Core Components
Demolition comes first, but proceed carefully. Remove fixtures in reverse order of installation: mirrors and accessories, then vanity, toilet, and finally tub or shower. Salvage anything you plan to donate or reuse. Watch for hidden damage as you expose walls and flooring. Once demolition is complete, address any necessary repairs to subflooring, wall studs, or moisture barriers before moving forward.
Rough-in work for plumbing and electrical happens next. If you are relocating fixtures, this phase becomes critical. Many jurisdictions require permits and inspections for plumbing and electrical changes. Even if you are confident in your skills, hire licensed professionals for gas line work or significant electrical modifications. The cost of professional installation for complex systems is modest compared to the risk of improper DIY work.
Install your shower or tub surround first, followed by flooring. Use proper waterproofing membranes in wet areas. Apply thinset mortar evenly, checking for lippage as you set each tile. Allow adequate drying time between steps. Rushing tile installation leads to cracked grout and loose tiles within months. Mount the vanity and toilet once flooring is complete and fully cured. Connect supply lines carefully, checking for leaks before closing up walls or adding trim. If you discover plumbing complications beyond basic connections, the team at Buffalo Construction & Restoration AZ can handle those intricate installations while you focus on the finishes you enjoy most. Install lighting fixtures, mirrors, and hardware last.
Finishing Touches and Common Troubleshooting
The final phase transforms your functional bathroom into a polished space. Apply grout to tile joints, working in small sections to ensure even coverage and proper depth. Wipe away excess grout before it hardens. Seal grout lines after they cure fully, typically 48 to 72 hours after application. In Prescott’s dry climate, grout can cure faster than in humid regions, so monitor closely and seal promptly to prevent staining.
Caulk all seams where fixtures meet walls or flooring. Use high-quality silicone caulk rated for kitchen and bath use. Apply painter’s tape on both sides of the joint for clean lines, then tool the caulk bead with a wet finger or caulk tool. Remove tape immediately while caulk is still wet. These details separate amateur work from professional-looking results.
Address common issues proactively. If your toilet rocks slightly, use plastic shims rather than overtightening bolts that can crack the porcelain. If grout cracked in corners, you likely needed caulk in those expansion joints instead. If shower doors leak, check that the threshold is level and the door sweep makes full contact. Most problems have straightforward solutions when caught early.
Stand back and evaluate your work. Touch up paint, adjust cabinet doors, and ensure all fixtures operate smoothly. Clean thoroughly, removing all dust and construction debris. When you encounter structural issues, code requirements, or tasks beyond your skill level, that is when professional remodelers can provide valuable support. Buffalo Construction & Restoration AZ offers bathroom remodeling services throughout Prescott and surrounding areas, handling the complex aspects while preserving your design vision. Your DIY bathroom remodel represents significant effort and investment. Taking time to finish properly ensures you enjoy the results for years to come.